|
原创:4ll3n
程序员的误操作造成数据丢失,忙着一个星期的项目,就这样付之东流了。老板的痛斥、经理的训斥接踵而来。接下来就是没休息、加班,甚至忙到凌晨都不能离开那该死的电脑,都有种想屎的感觉呢?
为那些不喜欢备份数据的朋友带来了福音,我们来谈谈数据恢复,这里我们来手把手地教会你如何利用简单的工具来恢复被你删除的数据。
工具: hexedit、fdisk
下文内容操作均在root环境下完成。
hexedit:

在linux上,经常会使用hexedit来修改程序的16进制代码。而fdisk这里就不介绍了。
现在我们走进磁盘的世界,看看磁盘它对数据做点了什么吧。
首先,在终端下使用root权限,来运行下命令:
Command: fdisk -l
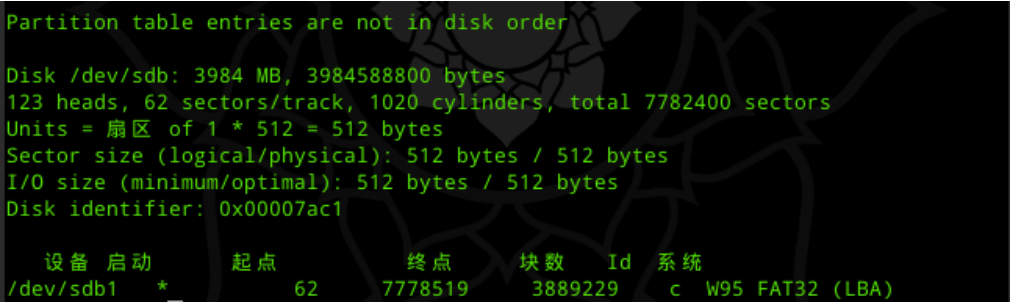
/dev/sdb1是今天的主角,从图片很清晰地看到一些相关数据,比如磁盘的size,、sector、I/O size等等。

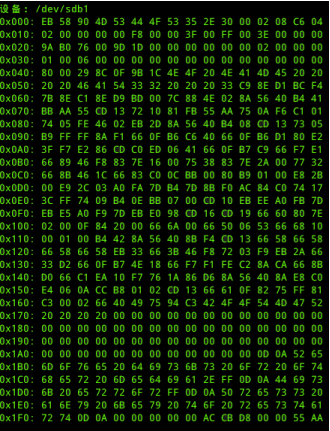
磁盘格式为ext4,而非MS上的vfat32和NTFS格式,在文章的结尾贴上FAT32的图片。
第一步:
运行fdisk,使用专家模式,来备份Partition table。
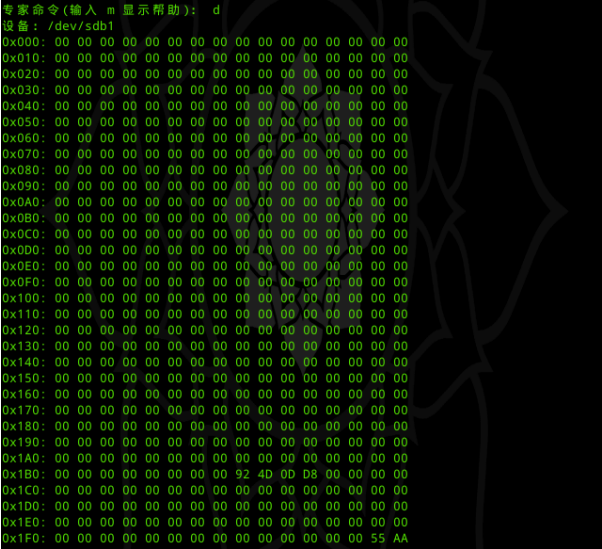
ext4的partition table非常简单,一般备份partition table为ext4.img。备份是为了避免数据恢复中被破坏。
第二步:
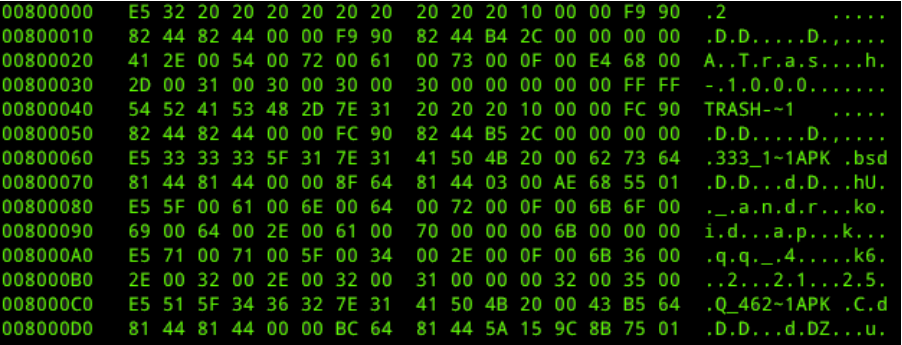
首先在target sdb1上执行剪切的命令操作,把sdb1上的文件移动到电脑硬盘上,执行完成后,使用hexedit 来打开sdb1。
被剪切的文件名:usb.png
Command : hexedit -s /dev/sdb1
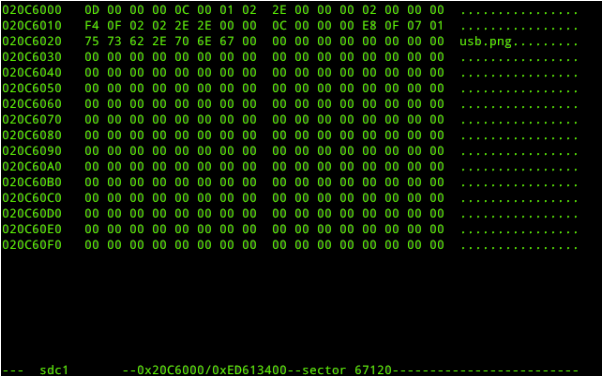
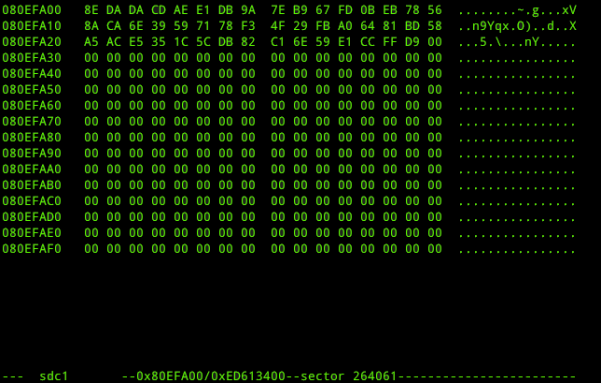
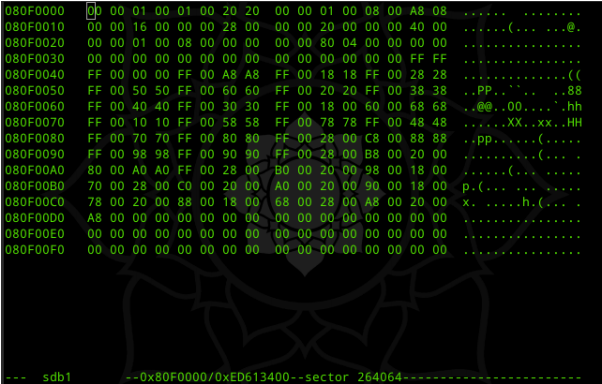
图片中可以看到文件名和它所在的sector, 是不是发现了图片的设备是sdc1?由于磁盘的自动挂载发生了dev的改变,而数据是不会随着磁盘的dev变化而变化的。这里已经找到了文件名的所在,接下来,需要找到文件header。
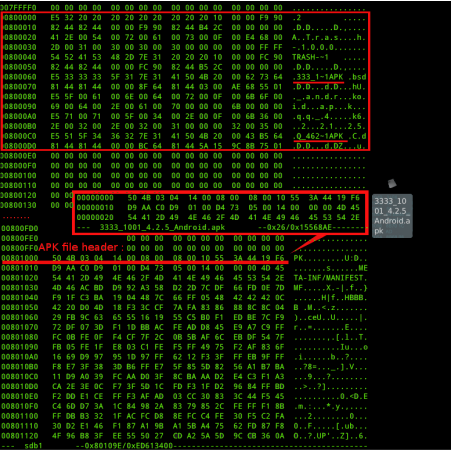
如何找到文件头呢? 可以利用hexedit进行hex search,如果是要着ASCII,可以按下TAB切换到ASCII区域。
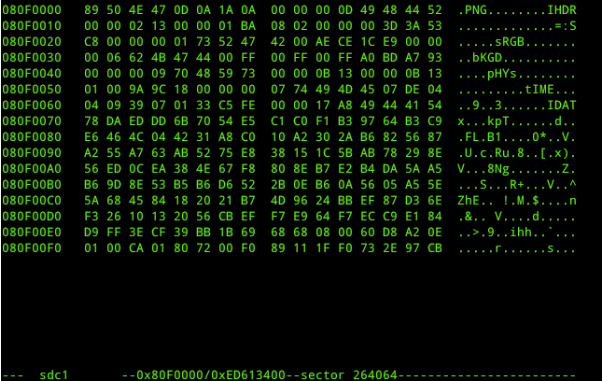
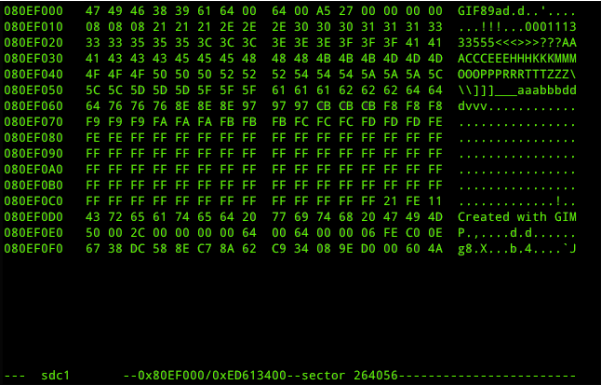
文件的大小决定了文件在磁盘中所占用的sector 数,1 sector==512 bytes。在图中,显示了文件header offset和sector。
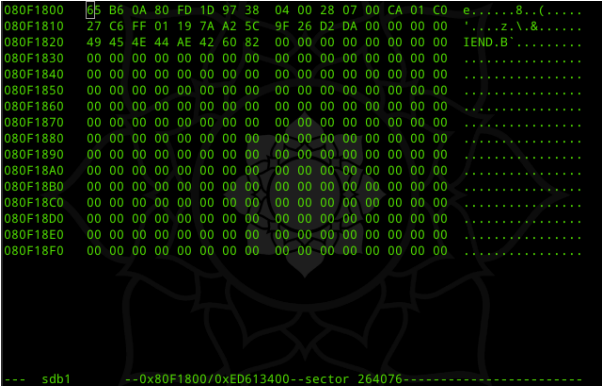
提取hex值,写入文件。

恢复后的图片:
上看着很简单吧,它只是单文件的剪切操作与数据恢复。这里提醒下各位:磁盘中保存的数据,不是删除了可以恢复,被剪切掉的数据一样可恢复。
下面我们来看看从磁盘删除数据后,如何来操作呢?
在磁盘上执行delete命令来删除一个名为1.gif的文件,操作如下:
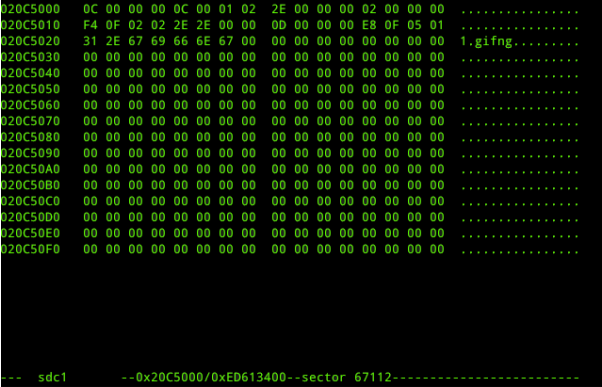  
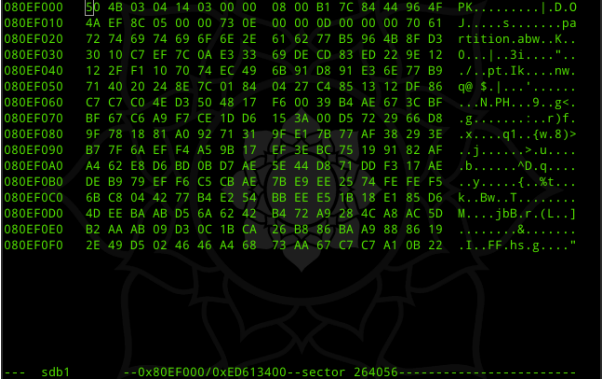
图片可以看到文件header到文件end的sector 的变化,header sector: 264056 , end sector: 264057,文件大小在1K, 图片很小。
创建个新文件,然后再执行delete操作,看看磁盘数据变化。
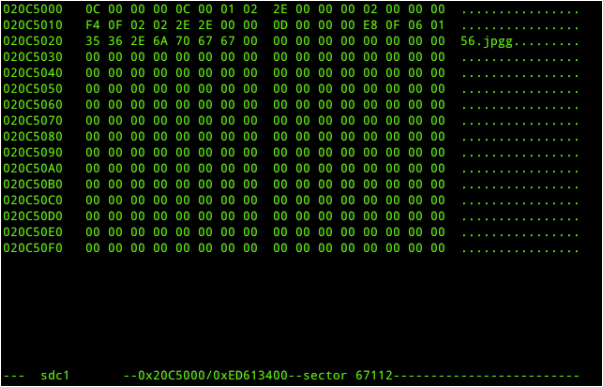  
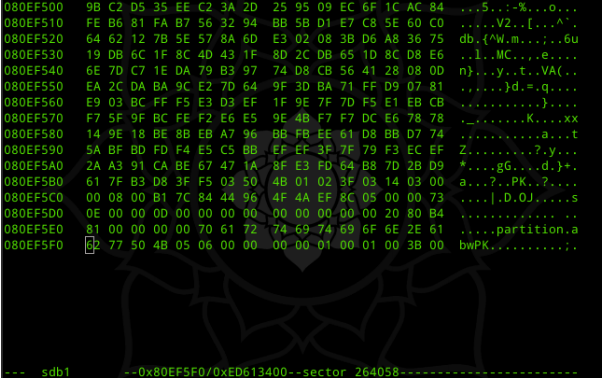
文件header sector : 264056, end sector: 264061 , 第一次执行删除的文件header sector: 264056 ,end sector : 264057, 这样可以看到第一次删除的数据被覆盖掉,而保留了第二此删除的数据。
这里操作是对磁盘单一文件进行数据恢复和其磁盘中的数据变化进行论证。接下来我们来看看双文件的操作。
磁盘中存在两个不同类型的文件。
-
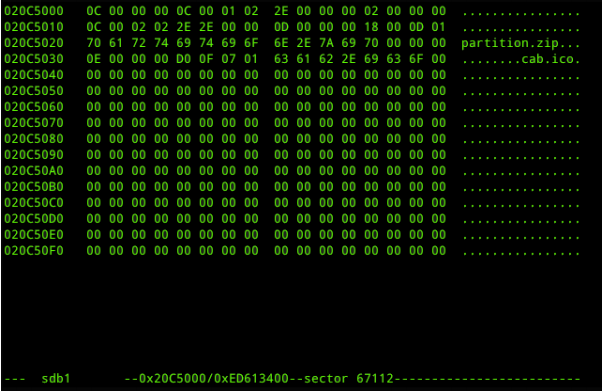
文件名:partition.zip
-
文件名:cab.ico
第一个文件的header secotor:264056,end sector:264058
第二个文件header sector:264064,end sector:264076。发现第一个文件的end sector与第二个文件的header sector相差多个sector,那么中间的差值是什么呢?
可以看到中间的差值全部以00填充。到这里我们来总结下这次在linux上的实践操作:
ext4 file system
执行 剪贴
file name : usb.png sector 67120
file header : sector 264064 file end: sector 264076
执行 删除
file name : 1.gif sector 67112 (覆盖)
file header: start : sector 264056 end: sector 264057 (覆盖)
file name: 56.jpg sector 67112
file header:start: sector 264056 end: sector 264061
当单文件时,执行删除时,覆盖上一次被删除的数据。
储存文件
(1) file name : partition.zip sector 67112
file header: start sector 264056 end sector 264058
(2) file name : cab.ico sector 67112
file header: start sector 264064 end sector: 264068
剪切区:sector 264064
删除区: sector 264056
储存区:与删除区共存
储存区: 当单文件时,储存文件覆盖删除区数据。
数据恢复:当多文件时,执行删除时,删除区保留数据hex,如果建立新文件数据时,将覆盖被删除数据hex。
附图:
FAT32磁盘格式图:
(全文完)
|
